配方:rsyslog + Redis + Logstash
💡一则或许对你有用的小广告
欢迎加入小哈的星球 ,你将获得:专属的项目实战(已更新的所有项目都能学习) / 1v1 提问 / Java 学习路线 / 学习打卡 / 每月赠书 / 社群讨论
- 新开坑项目:《Spring AI 项目实战》 正在持续爆肝中,基于 Spring AI + Spring Boot 3.x + JDK 21..., 点击查看 ;
- 《从零手撸:仿小红书(微服务架构)》 已完结,基于
Spring Cloud Alibaba + Spring Boot 3.x + JDK 17...,点击查看项目介绍 ;演示链接: http://116.62.199.48:7070 ;- 《从零手撸:前后端分离博客项目(全栈开发)》 2 期已完结,演示链接: http://116.62.199.48/ ;
截止目前, 星球 内专栏累计输出 100w+ 字,讲解图 4013+ 张,还在持续爆肝中.. 后续还会上新更多项目,目标是将 Java 领域典型的项目都整一波,如秒杀系统, 在线商城, IM 即时通讯,权限管理,Spring Cloud Alibaba 微服务等等,已有 3700+ 小伙伴加入学习 ,欢迎点击围观
好的,所以你想将 rsyslog 与 Logstash 连接起来。如果您不记得为什么要这样做,请让我给您一些提示:
- Logstash 可以做很多事情, 它很容易设置 ,但往往 太重而无法放在每台服务器上 。
- 您已经安装了 Redis,因此可以将其用作集中式队列。如果您还没有它,那么值得一试,因为它对于这种工作负载来说非常轻便。
- 你几乎所有的 Linux 机器上都有 rsyslog。它 轻巧且功能强大 ,那么为什么不将其推送到 Redis 以便与 Logstash 连接呢?
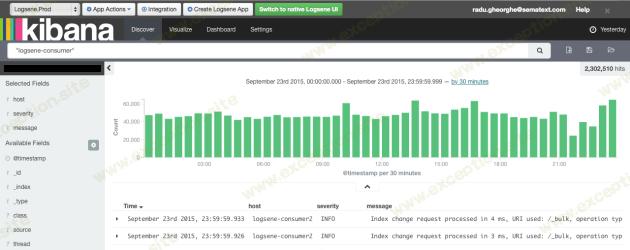
在这篇文章中,您将看到如何安装和配置所需的组件,以便您可以发送本地系统日志(或带有 rsyslog 的尾文件),在 Redis 中进行缓冲,以便您可以使用 Logstash 将它们发送到 Elasticsearch,一个 日志记录 SaaS比如 Logsene (它 公开了用于索引和搜索的 Elasticsearch API ),因此您可以使用 Kibana 搜索和分析它们:
获取成分
首先,您可能需要更新 rsyslog。大多数发行版都带有旧版本,并且没有您需要的插件。有 适用于大多数流行发行版的软件包 ,但您也可以从源代码进行编译。在撰写本文时,还没有 omhiredis 包( rsyslog 中的 Redis 输出模块 ),因此从源代码编译是唯一的选择:
 ./configure --enable-omhiredis # add other options if you want
# like --enable-imfile for file tailing. try ./configure --help for all the options
此时配置脚本可能会因缺少依赖项而哭泣。寻找你的发行版的 $NAME-devel 包,并确保你有 rsyslog 存储库 ,因为它们提供了所需的包,如 json-c。 configure 成功运行后,您将编译并安装它:
 ./configure --enable-omhiredis # add other options if you want
# like --enable-imfile for file tailing. try ./configure --help for all the options
现在您可以通过 /usr/local/sbin/rsyslogd 启动新的 rsyslog(先停止旧的)。使用 -v 运行它以检查版本(本教程至少需要 8.13),添加 -n 以在前台启动它,添加 -dn 以调试模式启动。
排除 rsyslog 后,您将安装 Redis。同样,我按照 此处的 说明从来源获得了它。
随意浏览 redis.conf(我已经增加了发布/订阅客户端的缓冲区限制,我们将在此处使用)然后通过以下方式启动它:
 ./configure --enable-omhiredis # add other options if you want
# like --enable-imfile for file tailing. try ./configure --help for all the options
最后,您将拥有 Logstash。在写这篇文章时,我们有一个 2.0 测试版,其中有 很多改进 。这里不需要编译,我们只需浏览 logstash.conf 并通过以下方式启动 logstash:
 ./configure --enable-omhiredis # add other options if you want
# like --enable-imfile for file tailing. try ./configure --help for all the options
配置 rsyslog
使用 rsyslog,您需要先加载所需的 模块 :
 ./configure --enable-omhiredis # add other options if you want
# like --enable-imfile for file tailing. try ./configure --help for all the options
如果你想拖尾文件,你必须为每组文件添加定义,如下所示:
 ./configure --enable-omhiredis # add other options if you want
# like --enable-imfile for file tailing. try ./configure --help for all the options
然后你需要一个 模板 来从你的日志中构建 JSON 文档。您可以使用 Logstash 在另一端获取这些 JSON。这是一个适用于普通系统日志的方法:
 ./configure --enable-omhiredis # add other options if you want
# like --enable-imfile for file tailing. try ./configure --help for all the options
默认情况下,rsyslog 有一个 10K 消息的内存
队列
,并且有一个线程可以处理最多 16 条消息的批次(您可以
在此处找到所有队列参数
)。您可能想要更改:
– batch size,它也控制一次发送到Redis的最大消息数
– 线程数,也将并行发送到 Redis
– 队列的大小及其性质:内存中(默认)、磁盘或磁盘辅助
在 rsyslog->Redis->Logstash 设置中,我假设你想保持 rsyslog 轻,所以这些数字会很小,比如:
 ./configure --enable-omhiredis # add other options if you want
# like --enable-imfile for file tailing. try ./configure --help for all the options
即便如此,我 每秒至少有 20 万个事件被推送到 Redis! 说到推送到 Redis,这是最后一部分:
 ./configure --enable-omhiredis # add other options if you want
# like --enable-imfile for file tailing. try ./configure --help for all the options
假设 Redis 已启动,rsyslog 将继续推送给它。
配置 Logstash
这是我们选择 JSON 日志(如先前模板中定义的)并将它们转发到首选目的地的部分。所以我们有输入,它将指向我们在 rsyslog 中使用的相同的 Redis 密钥:
 ./configure --enable-omhiredis # add other options if you want
# like --enable-imfile for file tailing. try ./configure --help for all the options
您可以使用过滤器来解析您的数据(例如 ,添加基于 IP 的地理信息 ),然后您将获得首选目的地的输出。以下是使用 Elasticsearch 输出推送到 Logsene 或 Elasticsearch 的方法:
 ./configure --enable-omhiredis # add other options if you want
# like --enable-imfile for file tailing. try ./configure --help for all the options
就是这样!现在 您可以使用 Kibana (或者,对于 Logsene ,Kibana 或 Logsene 自己的 UI)来搜索您的日志!
 异常教程
异常教程
